Saturday 31 March 2018

Lucky Enough


This tutorial was written by me on March 31st 2018.
Any similarity to any other tutorial is purely coincidental.
I hope you enjoy it J


Tube: gg1344 - Bebe by Keith Garvey

FTU Scrapkit: Lucky Enough by Bev at Horseplays Pasture Designs

Template 20 by Yvette at Essence of Creativity

Mask: WSL84 by Wee Scots Lass

Font: Marmellata Jam

Open Template
Shift D to copy.
Close original

Resize 130% All layers checked
Image – canvas size 700 x 700
Delete credit, and Background layers.

Layers – new raster layer
Fill white
Move to the bottom of the layers palette

Layers – new raster layer
Selections – select all.
Paste Paper 5 into selection
Deselect

Apply mask
In layers palette – merge group
Stretch to sides and bottom
Drop opacity to 90
Mirror mask

Frame 8
Paste above mask layer
Slide to top left corner
Sharpen
Duplicate – Mirror – Flip
Dropshadow both

Clover Spray 2
Resize 60%
Paste above Frame 8 layers
Slide to bottom left corner
Sharpen
Duplicate – mirror – flip
Move flipped copy down a little
Dropshadow both

Set foreground colour to #97450d
Set background colour to #dfb61c
Make gradient Angle 90 with 1 repeat. (Darker colour on sides)

THIN RECTANGLE 2
Selections – Select All. Selections – Float. Selections – Defloat
Layers – new raster layer
Fill with gradient
Deselect.
Give inner bevel of choice
Dropshadow.
Close template layer

THIN RECTANGLE 1
Change angle on gradient to 0
Selections – Select All. Selections – Float. Selections – Defloat
Layers – new raster layer
Fill with gradient
Deselect.
Give inner bevel of choice
Dropshadow.
Close template layer

Swirl 1
Paste above THIN RECTANGLE 1 gradient layer
Slide to top left corner
Dropshadow

LARGE CIRCLE
Selections – Select All. Selections – Float. Selections – Defloat
Selections – modify – expand 15
Layers – new raster layer
Paste Paper 10 into selection
Deselect
Close template layer

Frame 7
Resize 80%
Paste above the Paper 10 circle
Slide right to cover the edges of the circle
Sharpen
Dropshadow

Rectangles
Position mid-sized tube over the rectangles and move until you have it in a position you like
Click on Rectangles layer
Selections – Select All. Selections – Float. Selections – Defloat
Layers – new raster layer
Paste Paper 7 into selection
DO NOT DESELECT
Selections - invert
Click on tube layer and hit delete.
Deselect

Make sure tube layer is above Paper 7, and below the frames
Layers – properties – luminance legacy
Effects – texture effects – Blinds
Width 4, Opacity 30, Colour White
Drop opacity to 55

Frames
Selections – Select All. Selections – Float. Selections – Defloat
Layers – new raster layer
Paste Paper 5 into selection
Deselect
Adjust – add noise – Gaussian 35
Give inner bevel of choice
Dropshadow

Bow 4
Resize 20%
Paste above Frames layer
Slide to sit on left, in the gap between square frames
Sharpen
Duplicate – mirror
Slide left to sit in gap
Dropshadow both

Main Tube
Paste above Frames layer and position so her left hand appears to lean on the bottom frame
Sharpen
Dropshadow

Flower Basket
Resize 65%
Paste above tube
Slide to bottom right corner
Sharpen
Dropshadow

Erase tube’s legs showing below basket

Bird
Resize 35%
Paste above Flower Basket layer and slide to sit on left hand of tube.
Sharpen
Duplicate – mirror
Slide to sit on basket
Dropshadow both

Dragonfly
Resize 30%
Paste above Bird layers and slide left
Sharpen
Duplicate – mirror
Position as desired
Dropshadow both

Add copyright, close white background.
Save as a png.
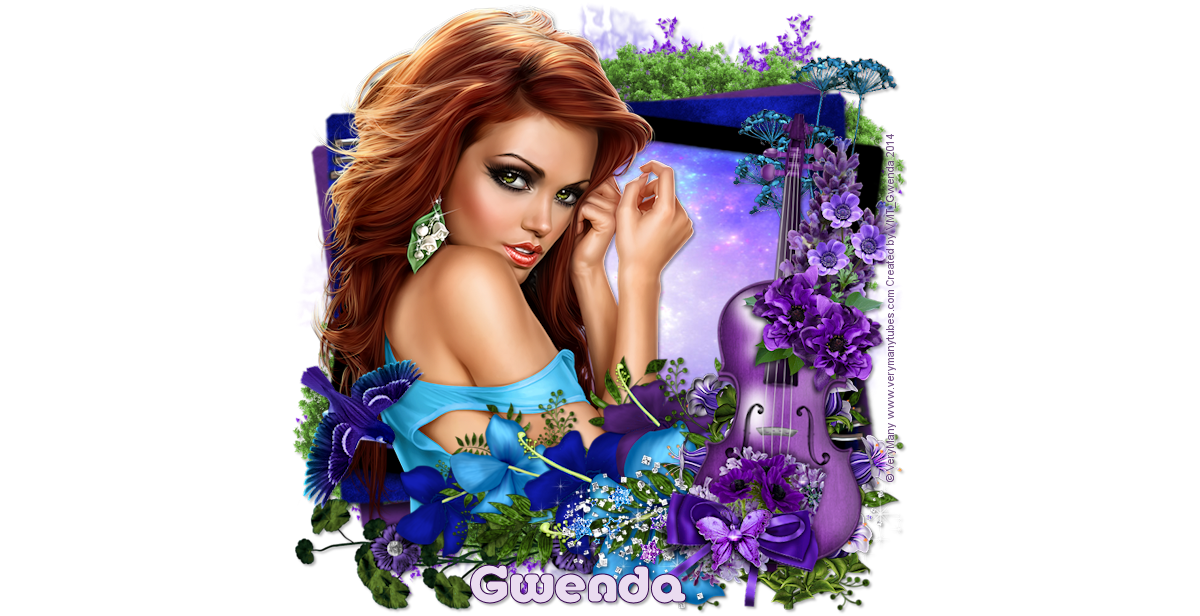


Friday 30 March 2018

Easter Cuteness


This tutorial was written by me on March 29th 2018.
Any similarity to any other tutorial is purely coincidental.
I hope you enjoy it J

Tube: Cat by Kajenna at Picsfordesign

FTU Scrapkit: Easter Cuteness from my dear friend Peggers, at Creative Addictions (scroll down a little to find it under her name)

Mask: WSL224 by Wee Scots Lass

Font: Ballpark


Open new image 700 x 700
Fill white.

Layers – new raster layer
Selections – select all.
Paste Paper 1 into selection
Deselect

Apply mask
In layers palette – merge group
Stretch to all edges

Pink Glitter
Mirror
Paste above mask layer
Slide to bottom left corner
Sharpen
Duplicate –flip
Merge both together
Duplicate.
Dropshadow both

Pink Frame
Resize 95%
Paste above Pink Glitter layers.
Click inside with magic wand
Selections – modify – expand 5
Paste Paper 1 into selection
Deselect
Flip
In layers palette, move paper to sit below frame
Sharpen frame
Dropshadow frame

Pink Flower
Resize 50%
Paste above Frame layer
Slide to the right a little
Sharpen
Dropshadow

Tube
Resize 48%
Mirror
Paste above Pink Flower layer.
Slide to bottom left corner.
Sharpen
Dropshadow

Flower
Mirror
Paste above tube layer
Slide to bottom right corner
Sharpen
Duplicate.
Resize top copy 40% then 80%
Slide to bottom right corner
Sharpen
Dropshadow both

Tree
Resize 70%
Paste between the two Flower layers
Slide to top right corner
Sharpen
Dropshadow

Pink Flower 2
Resize 50% then 70%
Paste above Tree layer
Slide up and right
Sharpen
Duplicate – Mirror
Slide this copy to far right centre
Dropshadow both

Yellow Flower
Resize 50%
Paste between the two Pink Flower2 layers
Free rotate Right 15
Slide to far right centre
Sharpen
Dropshadow

Flower 2
Paste above top copy of Pink Flower2
Slide to far right centre
Sharpen
Dropshadow

Basket
Resize 60%
Paste above Flower2 layer
Slide to bottom right corner
Sharpen
Dropshadow

Egg 3
Resize 50%
Paste above basket layer
Slide so top of egg sits just below handle
Sharpen
Dropshadow

Easter Egg CU-7
Resize 60%
Paste above Egg 3 layer
Free rotate Right 25
Slide into position at the right of the basket
Sharpen
Dropshadow

Easter Egg CU-8
Resize 55%
Paste above Easter Egg CU-7 layer
Slide into position at left of basket
Sharpen
Dropshadow

Egg 2
Resize 40%
Paste above Easter Egg CU-8 layer
Free rotate Left 15
Slide into position centre of basket, halfway down
Sharpen
Dropshadow

Move these 4 egg layers around until you like how they look.
We are going to erase the bottom of them all so they appear to be sitting inside the basket.
In layers palette, right click on Egg 3
Merge – Merge down
Repeat this until all four eggs are on one layer
Drop the opacity to about 34, so you can clearly see the basket underneath them.
Working on the merged egg layer, and using selection tool, carefully draw around the rim of the basket at top, and include all the egg bits below that.
Delete.
Put opacity of eggs back to 100 to check how it looks, and repeat if necessary.
I also erased around the left part of the handle.
Once you are happy with it, put opacity of egg layer back to 100, and merge down onto basket.

Next layer should be the small copy of Flower in bottom right corner.

Ratoncita
Resize 30%
Paste above small Flower layer
Slide to bottom, just to left of basket
Sharpen
Dropshadow

 Add copyright, close white background.
Save as a png.

Sunday 25 March 2018

Love You Forever


This tutorial was written by me on March 24th 2018
Any similarity to any other tutorial is purely coincidental.
I hope you enjoy it J

Tube: Devils Bride 2 by Alex Prihodko can be purchased

FTU Scrapkit: Owl Love You Forever by Mizteeque

Mask: WSL84 & WSL75 by Wee Scots Lass

Font: Beauty School Dropout

Open new image 700 x 700
Fill white.

New raster layer – Selections – Select all
Paste Paper 4 into selection DO NOT DESELECT
New raster layer
Paste Glitter 2 into selection
Deselect

Apply WSL Mask 84 to Paper 4
In layers palette, merge group
Stretch mask to all edges
Flip Mask

Apply WSL Mask 75 to Glitter 2
In layers palette, merge group
Resize Glitter2  105%, Resize all layers box Unchecked.
Effects – Texture Effects – Mosaic Glass
Duplicate Glitter 2 mask
Close white background
In layers palette – right click one of the mask layers.
Merge - merge visible
Open white background

Frame 1
Paste above mask layer
Slide to the bottom
Sharpen

Element 1 (Ribbon Bow)
Resize 15% then 90%
Paste above Frame layer
Slide to the far right
Sharpen
Dropshadow

Click on Frame Layer
Selections – select all. Selections – Float. Selections – Defloat. Selections – Invert
Click on Ribbon layer
Carefully erase any of the main ribbon outside the frame on top and bottom
Deselect.

Element 18 (Emerald Pin)
Resize 35%
Paste above merged ribbon / frame layer
Slide right so jewel sits over the knot of the ribbon
Erase the lumpy bit at the bottom
Erase part of the pin so it appears to be threaded through ribbon
Sharpen
Dropshadow

In layers palette right click on Element 18 layer
Merge – Merge down
Repeat, merging ribbon bow to Frame.
Rename this MERGED FRAME

Element 6 (Flower)
Paste below MERGED FRAME layer.
Slide to the left, inside the frame.
Duplicate twice.
Mirror one copy
Slide the other copy to the top inside the frame.
Duplicate – Flip.
Merge these four layers together
In layers palette, right click. Properties – Overlay

Element 23 (Sparkles)
Paste above Element 6 layer
 Slide up level with top inside of frame
Duplicate – Mirror – Flip
Merge both copies together
Dropshadow

Element 30 (Bead String)
Paste above MERGED FRAME
Free rotate Right 15
Slide to far left
Sharpen
Dropshadow

Tube
Resize 90%
Mirror
Using selection tool, select head and shoulders
Paste above Element 30 layer
Slide to the left a little
Sharpen
Duplicate
In layers palette, move one copy to sit just below MERGED FRAME layer
Dropshadow top copy of tube only

Back to MERGED FRAME layer.
Click inside with magic wand
Selections – modify – expand 4
Layers – new raster layer
Paste Paper 1 into selection. DO NOT DESELECT
Selections - Invert
Click on bottom tube copy and hit delete.
Click on Element 23 Sparkles layer and hit delete
Deselect.

In layers palette move Paper 1 to sit below Element 6
Move Element 23 to sit above Element 23

Dropshadow Frame

OK – quick check on position of layers here, from bottom up:
Paper 4 mask
Glitter 2 Mask
Paper 1 Circle
Element 6
Element 23
Bottom copy of tube
Frame (Merged with ribbon and Element 18)
Top copy of tube.

Element 12 (Heart)
Resize 50% then 80%
Paste above top tube layer
Slide down and right
Sharpen
Duplicate – mirror
Resize this copy another 80%
Slide right to overlap the other heart
Dropshadow both

Element 13 (Flower Spray)
Mirror
Resize 60%
Paste above Element 12 layers
Slide to bottom left corner
Sharpen
Rename 13A
Duplicate – mirror – flip
Rename 13B
Slide 13B down a little so it sits on the frame.
Dropshadow both
In layers palette, move top right copy to sit below top tube

Click on top tube
Erase the bottom of the tube, using the 13A flowers as a guide.

Element 19 (Butterfly)
Resize 25% then 80%
Paste above 13B layer
Free rotate Left 25
Sharpen
Duplicate – mirror
Place as desired

Add copyright, close white background.
Save as a png.


Wednesday 21 March 2018

Magical Moonlight


This tutorial was written by me on March 20th 2018.
Any similarity to any other tutorial is purely coincidental.
I hope you enjoy it


Tube: Angel 5 by VeryMany

FTU Scrapkit: Moonlight by Mizteeques

Mask: WSL84 by Wee Scots Lass

Font: Blue Plate Special

My Word art


Layer – new raster layer.
Selections – select all.
Paste Paper 2 into selection
Deselect
Apply Mask WSL84
In layers palette, merge group
Stretch to all edges
Mirror

Element 24 Glitter Splat
Paste above mask layer
Slide to bottom right corner
Dropshadow

Element 19 Green Lights
Resize 60%
Paste above Element 24 layer and slide to top left
Sharpen
Duplicate
Mirror
Dropshadow both

Element 3 Green Circle Frame
Resize 85%
Paste above Element 19 layers

Element 16 Blue Circle Frame
Resize 80%
Paste above Element 3 Layer

Element 32 Diamond Drops
Resize 65%
Paste below Element 3 layer
Slide left so the right hand diamond drop is in the centre of the frame
Sharpen
Dropshadow

Click inside the Blue Circle Frame with magic wand
Selections – modify – expand 4
Layers – new raster layer.
Paste Paper 1 into selection
DO NOT DESELECT

Layers – new raster layer.
Paste Paper 15 into selection
Selections – invert
Click on element 32 layer and hit delete
Deselect.

In layers palette, move Paper 15 circle down, to sit above element 19 layers
Move Paper 1 circle to sit above Paper 15. Drop opacity of Paper 1 to 65
Move Element 32 to sit above Paper 1

Give both green and blue frames inner bevel of choice, and dropshadow both.

Element 20 Green Twirl
Flip – Mirror
Resize 40%
Paste above Element 16 Frame layer
Slide to far left and down a little
Sharpen
Dropshadow

Element 26 Leaves
Resize 75%
Paste above Element 20 layer
Slide to bottom left corner
Sharpen
Dropshadow

Element 30 Blue Heart
Resize 30%
Paste above Element 26 layer
Free rotate Left 15
Slide left and down a little
Sharpen
Duplicate – Mirror
Slide copy to far right
Dropshadow both

Element 12 Leaf Bud
Mirror
Resize 50% then 70%
Paste above Element 30 layers
Slide left and down a little
Sharpen
Duplicate.
On bottom copy, free rotate Right 45
Slide up a little
Sharpen
Dropshadow both

Element 40 Lantern
Paste above Element 12 layers
Slide far right
Sharpen
Dropshadow

Tube
Resize 90%
Erase from waist down
Paste above Element 40 layer
Slide to the top centre
Sharpen
Dropshadow

Element 23 Sparkles
Paste above Tube layer
Free rotate Right 90
Slide to bottom left corner
Sharpen
Dropshadow

Element 35 White Flower
Resize 50%
Paste above Element 23 layer
Free rotate Right 90
Slide to bottom right corner
Sharpen
Duplicate – mirror
Resize mirrored copy another 80%
Slide down a little
Dropshadow both

Element 11 Spiky Flower
Mirror
Resize 35% then 80%
Paste above Element 35 layers
Slide down and left
Sharpen
Dropshadow

Element 36 Blue Flower Stem
Resize 60%
Paste above Element 11 layer
Free rotate Right 90
Slide to the bottom and right a little
Sharpen
Dropshadow.

Element 7 Lilac Flower
Resize 70%
Paste above Element 36 layer
Slide to bottom centre
Sharpen
Dropshadow.

Element 17 Butterfly
Resize 30% then 75%
Paste above Element 7 layer
Position as desired
Sharpen
Duplicate - mirror
Dropshadow.

Wordart
Add above Element 26 layer if desired

Move all elements around until you like how they look

Add copyright, close white background.
Save as a png.